This is a video by Sonya Chinn demonstrating how she used line pattern with an offset to quilt a specific distance from a seam line.
If you prefer to watch it on youtube because the whole screen isn't visible here, this is the link.

How to Use This Blog
Since we have lots and lots of videos here, you will need to know the best way of finding what you are looking for. Each post has the video(s) of the topic it is about. Sometimes there will be more than one video that is a continuation of the previous one. These videos will be posted together within the same post. To find what you are looking for, either use the search box or the list of categories posted in the right column.
The IQ system is constantly evolving, so please keep in mind that some of the older videos may show features that have been replaced by newer ones, or buttons that have changed position or names. However, the videos have not been removed because the methods demonstrated are still valid.

The IQ system is constantly evolving, so please keep in mind that some of the older videos may show features that have been replaced by newer ones, or buttons that have changed position or names. However, the videos have not been removed because the methods demonstrated are still valid.
Friday, December 14, 2018
Tuesday, November 13, 2018
Adjusting the motors
The motors in this video are the older kind with gears rather than drive belts, but adjusting them is exactly the same, so ignore the gears, if you don't have them, and pay attention to the screws being adjusted by Jim Higginbotham.
Adjust the height of the motors when iQ is either turned off or set to manual mode. You need to get down and look at the gap between the drive wheel (that's the flat sided wheel under the motor). Ideally it shouldn't be any greater than the thickness of two credit cards. The wheel should be completely over the surface it runs along and the gap should be even. If your gap is wider at one side than the other, alter the appropriate screw to level it (the silver ones in this video)
This can be a time consuming job, but you will be able to do it. Don't be tempted to loosen the screws more than a quarter turn at a time - do the adjustment just as Jim shows, checking the height after each adjustment.
When you have the motors adjusted, you must calibrate iQ, and run the drift test just to make sure everything is correct.
Tuesday, August 28, 2018
Setting up a pattern with echoes, no-sew zone, and clipping block
This video by Heather Buchwitz is an overview of using echo pattern, no sew block and clipping blocks to create an echo and background fill.
Heather realized that the extra jump stitches that puzzled her in the video were there because she left jump stitch as the transition when she added the background fill panto to the block. Changing that transition to continuous would have eliminated those jump stitches.
To view the video on Youtube, use this link https://youtu.be/ykof7G_eHCk
Sunday, July 22, 2018
Computer arts spirograph
Here's another great video by Connie showing how to she created a design for her quilt using the spirograph pattern in the computer art pattern catalog.
How to set up and stitch a panto on a large, non-rectangular quilt.
Thanks to Connie for making this very clear video showing how to set up and stitch a panto on a non-rectangular shaped quilt. This was video made in response to a question asking how to stitch a large octagon shaped table runner.
Saturday, July 21, 2018
Fan Pattern
These step by step notes are just a taster, but should get you started playing with fan pattern and creating your own designs. I haven't included screenshots for the first example to encourage you to follow the steps to find out what happens.
Here's another idea to try.


 Betty Flower
fanned
Betty Flower
fanned
Note – pay attention to the
number of repeats – sometimes a pattern may appear to have five repeats, for
example, but may in fact have more because they are right on top of each
other. When stitched, they will
show up as double stitching.
Many of the simple shapes in the geometric catalog make very interesting patterns when fanned. Take a few minutes to play and explore.
Simple shapes can
be fanned to make very interesting patterns. Change the angle and number of
repeats. Moving the pivot point,
which is the start point of the pattern, can really change the fan patterns.
Follow these step by steps as an example.
Place arc-2 from the geometric catalog in a block. Select add pattern, fan
pattern.
Set the angle to 1º, repeats 20.
Select Alternate then touch the + or – sign to see what
happens.
Now touch the start point (the pivot point) your stylus move the it around.
Change the angle to 10º. Move the pivot point again.
Change repeats to 36.
Keeping the transition continuous joins the individual
pattern repeats in the fan.
To quickly generate a pattern that will fill a quarter
circle, a half circle or a full circle, select Sweep then touch + or – to
change the selection.
Touch all the buttons to find out what they do. If you happen to create a pattern you really like along the way, touch finished then find save pattern and save your creation for future use.
Back out and change the pattern to Fleur de Lis (Patterns by
Helen)
Repeats 6. Angle 60º.
If you want to change the pivot point on a closed pattern,
go back to the modify pattern page and move the start/end point. (Touch the button that says start/end, and drag the S/E to a position you prefer.) In the second and third screenshots below, I moved the start/end point of Fleur de Lis.
In the third screenshot, I also moved the pivot point.


Back out and change the pattern to Betty Flower.
Repeats 8. Angle 135º. Move the pivot point around until you
see the pattern pictured below.
Touch Close Pattern, then the + or – sign to see what
happens
 Betty Flower
fanned
Betty Flower
fannedMany of the simple shapes in the geometric catalog make very interesting patterns when fanned. Take a few minutes to play and explore.
Sunday, June 17, 2018
Troubleshooting tips #1.
When strange things happen, don’t panic and don’t assume the
worst. More often than not, the
problem is caused by something very simple and easily fixed.
These
troubleshooting lists start with the simplest and most common cause of the
problem. Start with 1 and work down the list. If you get to the end of the list
and haven’t solved the problem, copy your logs and post them at the support
page of intelliquilter.com adding a brief description of the problem.
Obstruction detected
1. Look
for a true obstruction on the quilt. Is the machine’s foot caught on a bulky
seam, an open seam, the edge of the quilt or a long thread? Has the machine moved as far as it can making the throat touch the take up bar or leveller bar?
2. Look
at the back of the quilt – has a long thread caught on the needle plate or a
wheel?
3. Look
on the table top – is there something laying across the tracks or the surfaces
where the motors run?
4. Look
at the cables at the back of the machine – has one caught on something? It may have caught momentarily on something under your machine. Move your machine by hand and watch the cords.
5. Look
at the take up roller or leveler bar. Is it high enough? Is the added bulk from Red Snappers or
Leadergrips rubbing on the throat of the machine or Y motor?
6. Check
the thread tension – has it suddenly become super tight?
7. Is
the quilt stretched too tightly?
8. Clean
the surfaces where the drive wheels run. If you suspect oil on the surface,
first use rubbing alcohol and rub hard, then follow up with Windex.
9. Look
at the sensor wheels – are they running in the correct position? Are they
turning?
10. Look
for thread caught around the drive wheels, sensor wheels or your machine’s
wheels.
11. Inspect
the drive wheels – has the rubber separated from the hub?
12. If you routinely have obstruction stops at one place on your table, run the motor auto setup right where the obstruction occurs. To find the auto setup, at the main menu, touch utilities > configuration > motor control setup/test and follow the instructions. There is a video demonstrating the auto set-up on this blog. Look for 'engagement strength' in the side menu.
13. If none of this helps, copy your logs and contact support at intelliquilter.com.
Thread Break
1. Is
the thread break sensor wheel turning in the right direction? It should be
turning clockwise. Look at the little arrow on the wheel as you pull the
thread.
2. Has
the thread jumped off the wheel?
3. Is
there slack in the thread coming off the cone? If so, use a thread net or place
a small piece of batting in the thread guide immediately above the cone to
control the thread.
4. Are
you using slick thread that isn’t grabbing the sensor wheel? If so, wind the
thread twice around the sensor wheel.
5. Is
the sensor wheel turning freely? Turn it by hand to check.
6. Disconnect
then re-connect the cable at the sensor wheel.
7. Disconnect
then re-connect the cable at the interface board on the docking station.
8. Use canned air to blow any dust out of both connections.
Demo Mode shows when
tablet is on the docking station.
1. Check
that the motors are plugged in. The motors must have power to them before starting up the tablet.
2. Shut
down IQ, remove the tablet then re-dock firmly.
3. Check
the connections on the interface board including the orange relays. Make sure all connections are fully
seated.
4. With iQ shut down and the power off, look
at the connections at the power supply box that’s mounted under the table – are
they all secure?
Communication Error
flashing at the top of the screen.
1. Back
out to the main menu, select utilities > configuration > interface setup/test >
communication test. You will see
which component isn’t communicating and can focus on checking the relevant connections.
2. Shut iQ down, remove the tablet and re-dock it firmly.
3. Check
that all the connections on the interface board on the docking station are
fully seated.
4. If
one of the motors isn’t communicating, after doing the above, remove the cover
and check its connections.
5. Copy
your logs, then go to intelliquilter.com and fill out the form on the support
page and attach your logs. Give a brief explanation of what you observed.
Touch screen responsiveness.
1. If
the tablet freezes or can’t get all the way through start up and the screen
doesn’t respond to touch, force quit by holding down the ‘on’ button, remove
the big battery or batteries and leave it/them out for about 30 minutes then replace it/them.
2. If
the touch screen doesn’t respond with the correct action, it probably needs
recalibrating. At the main menu, select utilities > configuration > preferences > touch calibration. Follow
the on screen instructions. If you are wary of doing this, contact your support person, or support at intelliquilter.com.
3. Go to support at intelliquilter.com and describe what's happening.
Thursday, June 14, 2018
Drift Test.
At the main menu, touch 'design/sew quilt' then 'edit/sew existing'.
Touch the catalog named 'TEST' and touch ' drift test'.
It's the one where you can see multiple rows of the heart leaf pattern.
Do not choose the one that is really dense, that looks just black.
It's the one where you can see multiple rows of the heart leaf pattern.
Do not choose the one that is really dense, that looks just black.
Touch 'continue'
This test is a 10" square.
The message says 'touch a reference point on the screen'
Touch the small green square where there is an S and E at the top left.
It's not right at the corner.
The message says 'touch a reference point on the screen'
Touch the small green square where there is an S and E at the top left.
It's not right at the corner.
Move your machine to where you want the S and E to be on your quilt.
(S is start and E is end)
Make sure the machine will be able to move 10 inches forward
without obstruction.
(S is start and E is end)
Make sure the machine will be able to move 10 inches forward
without obstruction.
Touch OK.
Now touch 'Sew Quilt' and then touch the image of the pattern.
It will turn green.
It will turn green.
Touch 'continue'
Touch 'Preview'
Your machine will move to the start of this pattern.
Place a piece of masking tape carefully under the needle.
Drop the needle to make a hole in the tape.
Drop the needle to make a hole in the tape.
Do not move the machine when you do this.
The Speed setting on the screen should be 1.8
The Details setting should be 1.4.
The Details setting should be 1.4.
Touch start and the machine will begin to move.
It will not stitch because it is in preview.
It will not stitch because it is in preview.
This pattern is not stitched because it is checking that
the motors are aligned correctly.
the motors are aligned correctly.
It will run for just over 8 minutes.
When it finishes the needle should be right over the original hole in the tape.
When it finishes the needle should be right over the original hole in the tape.
If it is more than a sixteenth of an inch away from the hole,
check that the motors are perfectly straight.
check that the motors are perfectly straight.
Do not touch the table or machine whilst the test is running.
Saturday, May 26, 2018
Echoing multiple patterns.
Echoing multiple
motifs.

It is possible to echo multiple patterns. When you get to the screen where you are asked to select the patterns to echo, touch as many as necessary. In the photo above, I touched both the hearts. I set the number of repeats, gap, and other settings to my liking and iQ filled the background with echoes.
In some instances there may be spaces left between the patterns that are larger than you'd like, so try altering the gap until you get a satisfactory result.

This image shows multiple motifs echoed. The block has not
been defined as a clipping block. This type of echoing could be used in a
border. When the choice of which pattern to echo has to be made, touch all the
motifs you want to echo.
Echoing Applique
Echoing Appliqué.
To echo around an appliqué, the perimeter of the appliqué
needs to be traced first.
Select Add Block then either trace on quilt or mark on
quilt. I often take a short cut here and select trace on quilt, lift the motors
then set my machine to regulated stitching and manually stitch in the ditch
around the appliqué as I trace. If you do this, remember to touch ‘start’ on iQ
before stitching. It’s very frustrating to think you’re tracing only to glance
up at the screen and see nothing. Don’t forget to touch stop at the end too.
The outline of the appliqué is now entered as a block on iQ
but it needs to be a pattern in order to create echoes.
On the Add/Edit block page, select Block to Pattern. If you
need to keep the original block to use as a no-sew zone or clipping block
later, copy the block and move the copy to one side before you change it into a pattern.
On a quilt with many appliqués that all look the same, such
as Sunbonnet Sue, it will be necessary to trace the outline of each appliqué
because no two will be the same. It won’t be possible to copy the first echoes
created and use them for every appliqué. Although this does take a little time
to set up, the results will be well worth the effort.
Filled Echoes
Filled Echoes.
This type of echoing looks most effective when the shape to be echoed is not too complicated. A smooth shape works the best. It does take more time to set up and stitch out but looks wonderful.

To create these filled echoes, I first set my pattern in the block then chose Add Pattern > Echo Pattern and touched the pattern I wanted to echo. Continue.
I set my initial number of
echoes to fill the block (in this example , that was about 13) with a .25 gap. I set the smooth to 25% because I was
going to use every other echo as a path so making them smooth allowed the path
pattern to follow them more pleasingly. Gap progress :0% and Points: rounded. Finished.
This time I set the transition to none.
Add/Edit Block > Add Block > Clipping Block.
I touched all the echoes that extended beyond the block and
selected jumpstitch as the transition.

Before adding the fill, I needed to split all the patterns
that were linked with jumpstitch lines.
Add/edit pattern > split pattern. I touched all the green
jumpstitch lines around the edge of the block until there were none remaining.
You can touch anywhere along a jumpstitch to split it, then it will simply
disappear.

Finished.
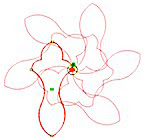
Add/Edit Pattern > Add Pattern > Path Pattern. I
touched the first echo line that I wanted to turn into a fill. (In the screenshot above, you can see the line I chose because it's red.) I chose pearls
to follow the path and increased the number of repeats until they filled the
space between the adjacent echo lines. Notice how the pearls are a little
distorted, if I wanted them to be more rounded, I would have to make the echoes
smoother at the initial set up.

I repeated those steps until I had all the filled echoes in
place.
Next I deleted all the echoes that I had used as paths. Zooming in really helps here.
Finally, I needed to do some clipping so I touched Finished > Add/Edit Block > Add Block > Clipping Block.
I touched Select All > Continue > Select Existing Block, and touched the square > Finished. I chose continuous as the transition because I'm only clipping the pearls at this stage so the continuous transition at the edge of the block would be very small..
This leaves the clipped pearls flattened at the edges, as
can be seen in the image at the beginning of this section. If that’s not
acceptable, use either shape shift or smooth to round them out.
When setting up the stitching sequence, you will have to tell iQ to stitch each echo and fill in turn. This allows you to customise the order in which they stitch out.

Grouped Echoes
Grouped echoes.
These really look special on a quilt and they would be nearly impossible to do freehand.


For the double echoes above, start by placing the pattern you want to echo in a block.
These are the next steps.
Add Pattern > Echo Pattern > touch the pattern you wish to echo. Continue.
Set the repeats to 2, gap
to .25, smooth to 0%, gap progress 0%, points sharp.
Touch the area outside the pattern.
Touch finished and chose jumpstitch as the transition. Finished.
Add/Edit Pattern > Add Pattern > Echo Pattern > this time select the echoes, not the original pattern, as the pattern to echo. Continue.
For this example, I set the repeats to 4 and the gap to .75 then touched the
area where I wanted the echoes.
The echoes will spill out beyond the block so it will be necessary to create a clipping block to remove the excess echoes, just as described in the first echo post.
You can see in my screenshot that I left the clipping block transition as jumpstitch (the green lines indicate that) This is a faster choice than splitting and combining but there will be lots of threads to trim away. If you choose jumpstitch, remember to set iQ to do backstitches.
Alternatively stop to cut threads could be chosen, but selecting continuous will create a lot of over stitching along the outside edge of the block.
To find out which transition you prefer, set this block pattern up three times on a practice piece and try each transition to see which one you prefer.
I would only split and combine the echoes into a different stitching path if I was working on a really special quilt. Usually jumpstitch works well because the little back stitching is hidden in the seam ditch of the block.
This same method can be used to create triple echo lines or
any number you please. Set the
initial echo repeats to what you want. You must touch finished, not accept, on
the echo pattern page even though you want to place more echoes. This is because you need to choose a
different pattern to echo.


Uneven Spiral Echoes
Uneven spiral echoes.

This screenshot shows spiraling echoes inside and outside
the feather.
The outside echo lines are not evenly spaced. I changed the
gap progress on the echo pattern page to create this effect. Gap progress is a percentage. Set at
25%, for instance, each gap between the echo lines will get 25% larger. Touch the +/- button to make each gap
25% smaller.
After placing the outside echoes, I touched accept not
finished. Touching finished exits
the echo pattern page. Touching accept returns you to the echo pattern page
after selecting the transition for these first echoes.
I chose spiral for my outside echoes and adjusted the start
point to a more pleasing position by dragging it on the screen. Touching
finished returned me to the echo pattern page.
I touched the inside of the feather to place echoes there
and made changes to the number of repeats, gap, and gap progress.
This was the last set of echoes I wanted so I touched
finished and chose spiral as the transition. The spiral looks a bit odd (look on the left hand side for sharp transitions between the starts and ends), so I
moved the start/end points to smooth the lines as much as possible.


They couldn’t be completely smoothed to my liking, so I
chose smooth pattern after finishing on the echo pattern page and cleaned up
the spiral.


Friday, May 25, 2018
Echoes
ECHOES.
It is possible to echo both inside and outside spaces of a
pattern, and to echo multiple patterns. iQ stitches echoes beautifully. They stitch out relatively fast and look very impressive. Each pattern to be echoed on a quilt, even if they seem identical, will need to be set up with echoes individually. This does take extra time so adjust your fee accordingly, if the quilt is for a customer.
Simple background echoes.

These are the steps for creating the echoes in this
illustration, starting after the motif is in place.
Add pattern > echo pattern > touch the motif >
continue.
I wanted the echoes outside my motif so I touched that
space.
There are several choices to make on this page. Notice IQ
always starts with 10 repeats, a gap of .25” and smoothing at 25% as the
default. All these can be changed to suit the project.

I changed the gap to make the distance between the echoes
larger. I changed the number of repeats so that they filled my block. Of
course, some of the lines extended outside the block. I changed the smooth to
0% because I wanted the echoes to mimic the motif as closely as possible.
I did not alter gap progress or points.
Finished. (I would have selected Accept here if I had wanted
to return and add more echoes to other areas of the pattern.)

Now I had to choose whether to keep all the echo lines as
separate patterns or combine them together. The advantage to combining the echo lines comes when the
stitching sequence is set up. If I kept the echoes separate by choosing the
transition: none, then I’d have to touch each echo line when sequencing. Combining the echoes, allows me to just
touch the echoes once because IQ will see them all as one pattern.
I chose jumpstitch as the transition by touching transition
then the + sign to change the option.
I did not change the sequence – I kept it at consecutive.
Finished.
My next step created a clipping block to get rid of the
extra lines that extend outside the block.
Add/edit block > add block > clipping block > I
touched the echoes > continue > select existing block > I touched the
square block > continue
The next page showed the echoes clipped, as I wanted them so
I touched finished which led me to another clipping confirmation page. I chose
jumpstitch because I wanted to do some editing of the stitching path in order
to reduce the number of times IQ would move around the block. The echo lines are circular so where
they are clipped, IQ would stitch one short section, move to the next corner to
stitch the next short section and so on, time after time for each clipped echo.
This would create a huge build up of thread along the edge of the block. I want
the stitching to be more continuous. Choosing jumpstitch here allows me to
split more easily.

Accept > yes > finished > add/edit pattern >
split pattern
I touched each jump stitch line at the outside edge of the
block in turn followed by split. It's not necessary to zoom in and carefully touch the green jump stitch line at either the start or end point, touching it anywhere, and then touching split will cut the jump stitch out. Keep touching the edge of the block until there are no more jump stitches to split out. You will see a lot of S and E points.

My next step was to combine each set of short echo lines in
the corners together. I selected Combine Pattern then thought about how I wanted these echoes to stitch and touched each in turn in the order that they'd stitch out.
(Shirley Higginbotham has a video, titled spiral echo,
showing this process)
In the screenshot at the start of this section, you can see
a long blue line going from the last full echo to one of the corners. This
indicates a tie off. After combining the short corner echoes into patterns, I
then combined all the echoes together again, choosing tie off as the transition
Filled Rays
Filled Rays.

Filled rays take a little longer to set up initially. If one
repeat or filled ray is saved (the left hand image below), the set up can be
customized for each quilt by altering the number of rays and space between
them. Alternatively a complete ray fill pattern can be saved (the right hand
image below).


These are the steps for making a filled ray.
Set up a block 10”x10”. Finished.
Choose the straight line from the geometric catalog.
Turn on the grid and change it to ½”. Turn snap on.
Move the start of the line so it snaps to a grid
intersection. Use stretch to anchor the start then move the end to a grid
intersection at the opposite side of the block, one square below the grid line
that the start is on. Finished.
Copy pattern > touch the line, continue.
Move the copy so that it is right on top of the original
line. Select Stretch and anchor the start. Move the end so that it is two
squares above the end point of the original line. Finished.
Copy pattern > touch one of
the lines, continue.
Move it so that the start snaps to the narrow end of the
rays. Use stretch to anchor that point and move the end so that it is centered between
the two rays, snapping it to the grid intersection half way between the rays.
Two rays are now complete and a fill can be added using path
pattern. The path will be the center straight line. Save this rays fill design
template if you want to use it again in the future. It has to be saved as a
quilt because the lines are not combined.

Add pattern > path pattern > select the centerline of
the rays. Continue.
You can choose any pattern that you think will make a good-looking
fill. I chose half circle 2 from the geometric catalog and increased the
repeats to 30. Finished.

Add/edit pattern > modify pattern, select the wavy line,
continue.
Touch the double arrows and select distort. Move the small
green squares so that the pattern fills the space between the two rays.

I make the fill start a little way up from the point because
a no-sew zone will nearly always remove that area. The fill at the center would
be just too small to sew anyway.
This is a zoomed in image – the grid is ½”.

Finished.
Now the two rays and the fill need to be combined. Combine
patterns. Touch the top ray, flip the start/end, continue > touch the fill,
continue > continuous stitch line. Touch the bottom ray, flip the start/end,
continue > continuous stitch line. Finished.
Delete pattern > touch the center straight line (the
path), continue > yes.
Save this pattern.
To make a complete circular pattern follow these steps.
Add/edit pattern > add pattern > fan pattern >
touch the ray pattern, continue.
Repeats 15. Angle 24º. It looks strange – don’t worry.

Grab the start point and drag it to the end point.

Close pattern: yes. Alternate: off. Transition: continuous.
If you want different spacing, change the angle and number
of repeats. Try 18 repeats and 20º. Try 36 repeats with 10º. As long as the two numbers multiplied
together make 360, you will get a complete circle with no double stitched rays.
Finished. If you like this spacing, save the complete
circular ray pattern.
Add/edit pattern > modify pattern > touch the rays
> continue. Move the rays so
they are centered over the block. Scale the pattern down if you want the fill
to be dense. Play with the scale and notice the difference.

Finished >
finished > add/edit block > add block > clipping block > select the
rays > continue > select existing block > touch the square >
continue > finished > transition continuous, accept > yes.

Finished > add/edit pattern > add pattern > block
pattern > use current block
> choose a motif. (I chose Betty Flower.)
Scale down the motif, finished > finished > add/edit
block > add block > no-sew zone > select the rays, continue >
create pattern contour, touch the motif > continue. Follow the instructions,
set smooth to 0%. Finished > finished.
This filled ray will have a transition at the no-sew zone so
consider which transition to choose. If you choose tie- off, you can manually
stitch in the ditch around the motif between the rays, but continuous or
jumpstitch may be good choices depending upon the intricacy of the no-sew zone.

In order to eliminate the transition at the no-sew zone,
it’s necessary to double stitch part of a filled ray. If thin thread is used,
the double stitching may not be noticeable. I prefer to double stitch the fill
because that will eliminate a transition at the clipped fill at the outside
edge of the block.
Having placed the fill pattern, it is then copied and placed
on top of the original.

The rays and fill are combined as follows. First one
straight ray with the start at the wide end.

Next the fill
with the start at the narrow end (these two will be combined with continuous
stitch).

Next the fill copy with the start at the wide end, and finally
the other straight ray with the start at the narrow end. The transition from
the fill to this straight ray will be continuous.

These instructions lead to a relatively narrow filled ray.
If you prefer a wider one, set the two rays further apart at the start.
Notice the difference between these two. They both have the
same number of filled rays.
The filled ray on the left was designed wider and with fewer
pattern repeats along the length of the ray.

Subscribe to:
Posts (Atom)