I often tell new iQ owners to play and explore, but what does that mean? In this brief video I do a little playing and exploring. I'm using my tablet in demo mode - off the machine - and touching buttons to find out what happens. I'm under no pressure to create or sew a quilt pattern - I'm just finding out what options there are and what happens when I touch buttons. No one can explore everything in one sitting - but it's enjoyable to do this when you have a few minutes. This is also a useful thing for seasoned iQ owners to do, especially after software updates when there may be changes and additions.

How to Use This Blog
Since we have lots and lots of videos here, you will need to know the best way of finding what you are looking for. Each post has the video(s) of the topic it is about. Sometimes there will be more than one video that is a continuation of the previous one. These videos will be posted together within the same post. To find what you are looking for, either use the search box or the list of categories posted in the right column.
The IQ system is constantly evolving, so please keep in mind that some of the older videos may show features that have been replaced by newer ones, or buttons that have changed position or names. However, the videos have not been removed because the methods demonstrated are still valid.

The IQ system is constantly evolving, so please keep in mind that some of the older videos may show features that have been replaced by newer ones, or buttons that have changed position or names. However, the videos have not been removed because the methods demonstrated are still valid.
Saturday, November 28, 2020
Offset and Progressive Offset
This short video shows the difference between offset and progressive offset.
Thursday, August 27, 2020
Creating a checker line pattern.
This is a short design video by Tonia Brooks showing how to create a line pattern that can be used for checker board backgrounds as she demonstrated in the latest iQ Academy class. This will be a very useful little pattern not only for background fills, but also to use in sashing, or to fill any square space.
This is the link to the video on Youtube. (I was unable to embed the video here.)
Note: iQ Machine Quilting Academy is a relatively new place to find iQ classes online. For a subscription, you can watch any past video for the length of your subscription. Anyone can watch the live classes for free, with a 12 hour replay window after the class. For more information go to https://iq-machine-quilting-academy.heysummit.com
Saturday, May 2, 2020
Start with a point to point triangle...
Another great design video from Sonya Chinn in which she shows a few ways to combine P2P triangle patterns to get several coordinated designs.
Wednesday, March 25, 2020
Creating Block Shapes and Patterns.
This a long but very good video by Sonya Kemmerer Chinn demonstrating how to create blocks and patterns using the geometric catalog. Sonya creates typical shapes such as pentagons, octagons, and triangles, as well as shapes for apple core and dresden plate quilts. At the end of the video she uses the computer art generated catalog to create star patterns. Sonya shows just how easy it is to create a block then change it to a pattern and vice versa, and how to save both.
Tuesday, January 21, 2020
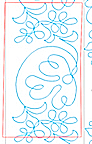
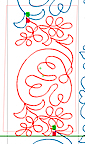
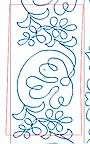
Borders using Path Pattern.
This is part of the handout from a borders class with Helen Baczynski describing how she uses path pattern for borders.
This is the easiest method for placing a border design because iQ will space the repeats evenly. There is no math involved.
A pattern can turn the corners easily when using path pattern. This is the one method where it is best to pre-plan the border of the whole quilt if you want the pattern to travel around the quilt and have all four corners looking good, especially when the quilt is a rectangle.
Of course, this makes the border perfectly straight so the real border block should be marked and the pattern adjusted slightly when work begins on the real quilt.
If a pattern does not turn the corners nicely, then it’s best to make all 4 sides separate paths and perhaps to join the patterns at the corners with an added geometric shape link.
Sometimes the best solution is to dead-end the borders and add a cornerstone motif at each corner. Another alternative is to make the pattern start at the center of each side and travel out to the corners, or start at the corners and meet in the middle of each side.
I never spend too much time trying to make a pattern turn a corner or connect at the corners.
Setting up the whole border.
Start by measuring the quilt then create a block for the whole quilt – this example is 55”x70”. Check that this block is centered on the grid.
The border is 5” wide, so create another block 45”x 60” and center it inside the bigger block.
Next add the pattern that will be the path – the square from the geometric catalog - and change the height and width so that the pattern runs in the correct position within the border. For example, if the start and end point of the border design that is to be stitched is at the lower edge of the design, then the square path should be placed close to the inside of the border block.
In the following example, the start and end of the pattern is at the center of the design so the square path is placed in the center of the border.
(If the path is not in the correct position, it can easily be adjusted later by selecting ‘modify path’ on the path pattern page.)
Move the start/end point of the square to the center of one of the sides. The grid can be used to place the pattern correctly. Select smooth and round out the corners of the square by setting smooth to 100%. This should make the pattern turn the corner pleasingly.


The path is complete.
Select a pattern for the border and change the number of repeats until all 4 corners look good. My example uses Loes Tulips Border. It has 30 repeats. The height was changed to 130% so that the border space was filled.


Note: if the corners aren’t looking good, select modify path and move the s/e point. That little move may make the corners look a lot better.
The path can be deleted once the border pattern is in place.
Setting up each side separately.
When setting up individual borders on the real quilt, line pattern can be used to make the path.
Mark the border block first using either mark on quilt or trace on quilt. Here I have marked the top border and a little way down each side border. I have added a diagonal line at each corner.
The most efficient way to mark the line pattern is to trace the seam line between the border and the body of the quilt. This will reflect any crookedness in the piecing so the pattern will follow this and look more pleasing. An absolutely straight pattern placed in a crooked border will look wrong.
Move the path to the correct position within the border bearing in mind the position of the start and end points of the pattern that will be following this path. If they are at the center of the pattern, move the path up to the center of the border.


Change the width of the path until each end reaches the diagonal line at each end of the border block if the pattern is to meet at the corners. (Mark the diagonal using line pattern) If you are placing corner stone motifs, there’s no need to change the width of the path.
Select the pattern that will ultimately be the border design. Change the number of repeats, and also the height of the pattern if necessary, until you get a pleasing result.


Notice how the path for the Betty Flower is in the center of the border whilst the path for Elephant is at the bottom of the border.
If the pattern doesn’t cross the marked diagonal line at the corner of the quilt, the pattern should connect at the corners without a problem.
In this example, the top border would be quilted, then the body of the quilt, then the bottom border. The quilt would then be turned to mark and complete the side borders.
Stitching the pre-planned border.
A pre-planned border allows you to quilt the side borders as you go but the pattern will have to be split down the sides into sections that can be quilted each time the quilt is advanced. The side borders can be split ahead of time or after each advance of the quilt because bringing the machine to the front will show how much can be quilted. Just look for the green needle crosshairs.

When the quilt is advanced, iQ will need to be realigned first to one side border before stitching, then realigned again to the other side border before stitching that one. Use the end of the stitching as the reference point for realigning.
It’s necessary to mark the sections of the border blocks within the stitching area after advancing to make sure the pattern is aligned correctly.
The bottom of the newly marked border section should pass through the end point of the pattern that will be stitched next.
The first picture shows where the needle was used to determine where to split the pattern.
The second picture shows the newly marked block and the third picture shows the pattern that needs to be altered to fit onto the real quilt (inside the newly marked block).

When the block is marked on the screen, it’s easy to move the pattern into the correct position using stretch once iQ has been realigned.
Anchor the start point of the pattern then swing the end point so that the pattern is centered in the real border. Because the block was marked passing through the end of the pattern, it’s easy to swing the pattern and keep the length of the pattern the same. Delete the original perfect border to make the image less confusing.
The modified border pattern will not match with the next section that’s yet to be quilted – look at the left hand screenshot below. Ignore the blue pattern.

Remember, as you stitch, the quilt shrinks so with each advance the pattern may not line up perfectly as it does on the screen. This doesn’t matter – pay attention to the quilt and re-align to the quilt. The image on the screen may look badly misaligned but don’t worry, it’s the quilt that needs to look good, not the image on iQ.
Stop stitching the side borders when you get close to the bottom of the quilt. Advance the quilt and stitch the bottom border before finishing the two side borders. This will enable you to adjust the last section of each side border so that they connect to the corners correctly.
This is an example of how a pattern appeared misaligned on the screen, and how it really stitched out. This is a corner that was stitched after turning a quilt, but it can look just as misaligned on the screen as you work down the sides. Pay no attention to the part of the pattern you’ve already stitched on the screen. Sometimes it is best to delete the parts that have been stitched to avoid confusion.


Subscribe to:
Posts (Atom)