How to Use This Blog

Since we have lots and lots of videos here, you will need to know the best way of finding what you are looking for. Each post has the video(s) of the topic it is about. Sometimes there will be more than one video that is a continuation of the previous one. These videos will be posted together within the same post. To find what you are looking for, either use the search box or the list of categories posted in the right column.


The IQ system is constantly evolving, so please keep in mind that some of the older videos may show features that have been replaced by newer ones, or buttons that have changed position or names. However, the videos have not been removed because the methods demonstrated are still valid.


Wednesday, January 24, 2018

Creating a circle of pearls.

I recently made and used this circle of pearls pattern on a quilt.


Several people asked how I created it so here are the steps, but first you need to create and save a continuous pearl pattern. I described how to do that in the previous blog post.

Starting at the main menu.
Design/Sew Quilt > Start New (answer any pop up questions appropriately)
Block Pattern > Enter Rectangle manually > use the default of 10"x10" > continue > Finished Select Circle from the geometric catalog (if you have re-organised your pattern catalogs, use search to find circle) > continue.
For this exercise, we'll make the pattern 10".
Touch width and make it 10" by sing the keypad. Touch height and make it 10". Finished.

Copy Pattern > touch the circle > continue.
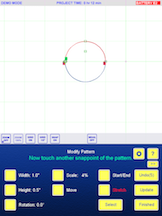
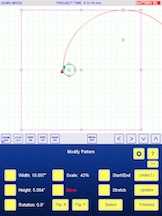
Grab the center reference point and move it until it snaps on top of the center point of the original circle.
Scale > change it to 90% using the keypad. Finished.
Copy Pattern > touch the smaller circle > continue.
Again, grab its center point and move it until it snaps to the center points of the other circles.
Scale > change it to 80%.
Your screen should now look like this.
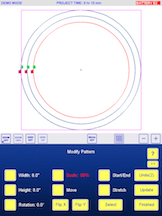

Finished.
Add Pattern > Path Pattern. Touch the middle circle to be the path > continue.
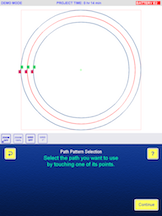

Now you need to find the continuous pearls you created. Continue.
This is what you should see.
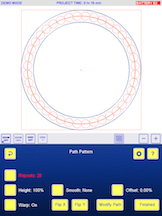

iQ will always start out by making 20 repeats. In this case, that looks good to me, but see what happens when you change the number of repeats. Experiment and play. Take the number to extremes what happens with 50 repeats? What happens with 4 repeats? Playing like this helps you understand what iQ can do and how you can customise patterns.

When you've finished playing, put the repeats back to 20.
Finished.
Add/Edit pattern > Delete pattern > touch the circle that was your path - the middle circle. Continue > Yes
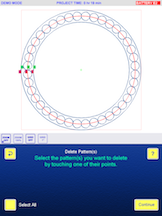

Now you have a pattern similar to the one I used but it is still three separate patterns. To make it one pattern, they need to be combined.
Touch Combine Patterns > touch the inside circle > continue > touch the pearls > continue.
Now you have to choose a transition. For my pattern I chose continuous because I wanted a continuously stitched design, and that little joining line was so short it was hardly noticeable, especially since I aimed to placed it at a seam line.
I then touched the outside circle to combine it and again chose continuous as my transition.
Finished > finished > Save Quilt/Pattern > Save a pattern from the quilt.
Give your pattern a name and save it in a catalog that makes sense to you.

When I created the pattern for my quilt, I traced the outline of the star as my block then created the circle of pearls to fit outside that star. Its size suited that quilt. My saved pattern may not work on too many other quilts but it wouldn't take very long to create a new one if I needed to do so.
I used the same pattern for all my stars - I realigned the center of the pattern to the center of each star as I worked on the quilt. There was no need to mark every star block because I had made the pattern so that it didn't touch the star - it floats around them.


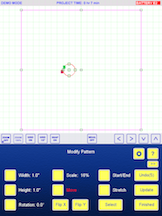
How to create a continuous pearl pattern.

This is a step by step tutorial so you can create your own simple pearl pattern. I list the buttons to touch so you can follow along. This type of tutorial is called a booster and you can find several more at the intelliquilter web site. The boosters there were made several years ago but you should still be able to work them out however.

How to create your own continuous pearl pattern.

Start at the main menu.
Design/Sew Quilt > Start New (answer any pop up questions appropriately)
Block Pattern > Enter Rectangle Manually.
The block size doesn't matter so just touch Continue > Finished
Open the geometric catalog and select circle (if you have re-organised you pattern catalogs, use search to find circle) > Continue.
Width - use the keypad to enter 1" > Height - use the keypad to enter 1"
(Alternatively you can select Scale and sweep the screen or use the minus sign to reduce the size of the circle to 1")
Touch Grid off. Change the grid size to half an inch by tapping the grid size button until you see half an inch.
Move. Touch the snap off button.
Touch the circle and move it until the S/E point snaps to the grid (it doesn't matter where)


Finished > Add Pattern > Block Pattern > Use current block > select Half Circle from the geometric catalog. (If you have re-organised your patterns, use search to find half circle) > Continue.
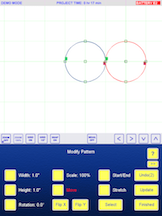
Grab the start point of half circle and move it until it snaps to the start point of the circle (Notice mine is huge)


Stretch > touch the start point for the anchor point of the pattern (this one will not move)
Now grab the end point of the half circle and move it until it snaps to the opposite side of the circle.
Zoom in or out as necessary.


Finished.
Combine Patterns. Touch the circle > continue > touch the half circle - just keep touching where you know the half circle is - you'll know you've touched when the message on the screen changes.
Continue > Finished.

Copy pattern > touch your pattern, which is one continuous pearl > continue.
Flip Y. (Doing this means that the double stitching will happen on alternate sides of each pearl, which I think makes it less noticeable.)
Grab the copy and move it until the S point touches the E point of the original pearl.


Finished.
Combine patterns > touch the first pearl > continue > touch the second pearl > continue.
Finished > Finished > Save Quilt/Pattern > Save a Pattern from the Quilt > touch the pearls > continue > name your pattern and save it in whichever catalog makes sense to you.

Even though we created this pattern as 1" by 2", it can be scaled up or down to suit your needs.


Tuesday, January 2, 2018

How to create your own modern panto.

Many modern pantos have a design that goes the full width of the quilt. These can be tricky to set up and I've shown how to do that using a repeated block pattern in another post. Panto only versions of iQ cannot use that method but this one should work for you.

Follow these steps:
Design/sew quilt > start new > pantograph > enter rectangle manually.
For this example I entered 75 x 90. If you want to save this quilt to use as a master, make it as big as necessary.
Continue > finished.
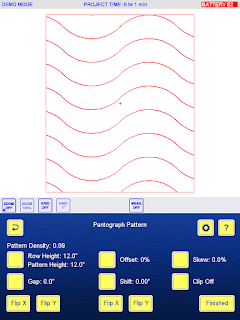
Select the geometric catalog and choose arc-2 for your panto.
This is what it will look like.


NOTE: if yours doesn't look like this, you need to change one of the settings, so touch the gear button (local configuration) up there by the help button, and the first preference listed is Line Up Start/End Points. If it says disabled, touch the button beside those words, then touch the plus or minus sign.
Your panto should now look like mine.

Whilst you're at the configurations, look at the choice for progressive offset. If it says disabled, touch the words and then the plus sign to change it to enabled. Finished.

Change the row height to 1".
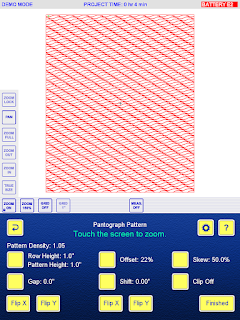
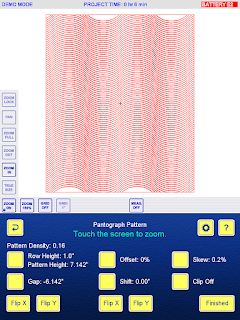
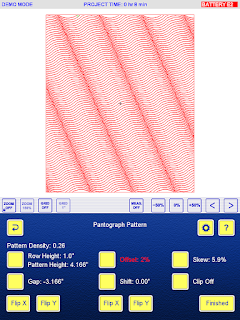
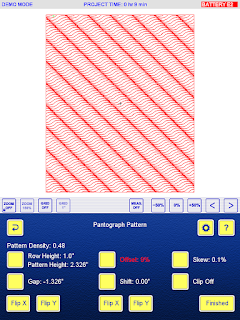
Now play around with the gap setting, the offset setting and the skew setting to see what you get. Here are some of the patterns I got. Look at my settings to replicate them on your tablet. (Click on the image to increase its size) Save the one you like the best as a quilt. Start again from the beginning to create some variations if you wish. By the way, you'll notice I always offset the pattern to the right, but ofcourse it can be offset to the left if you prefer.